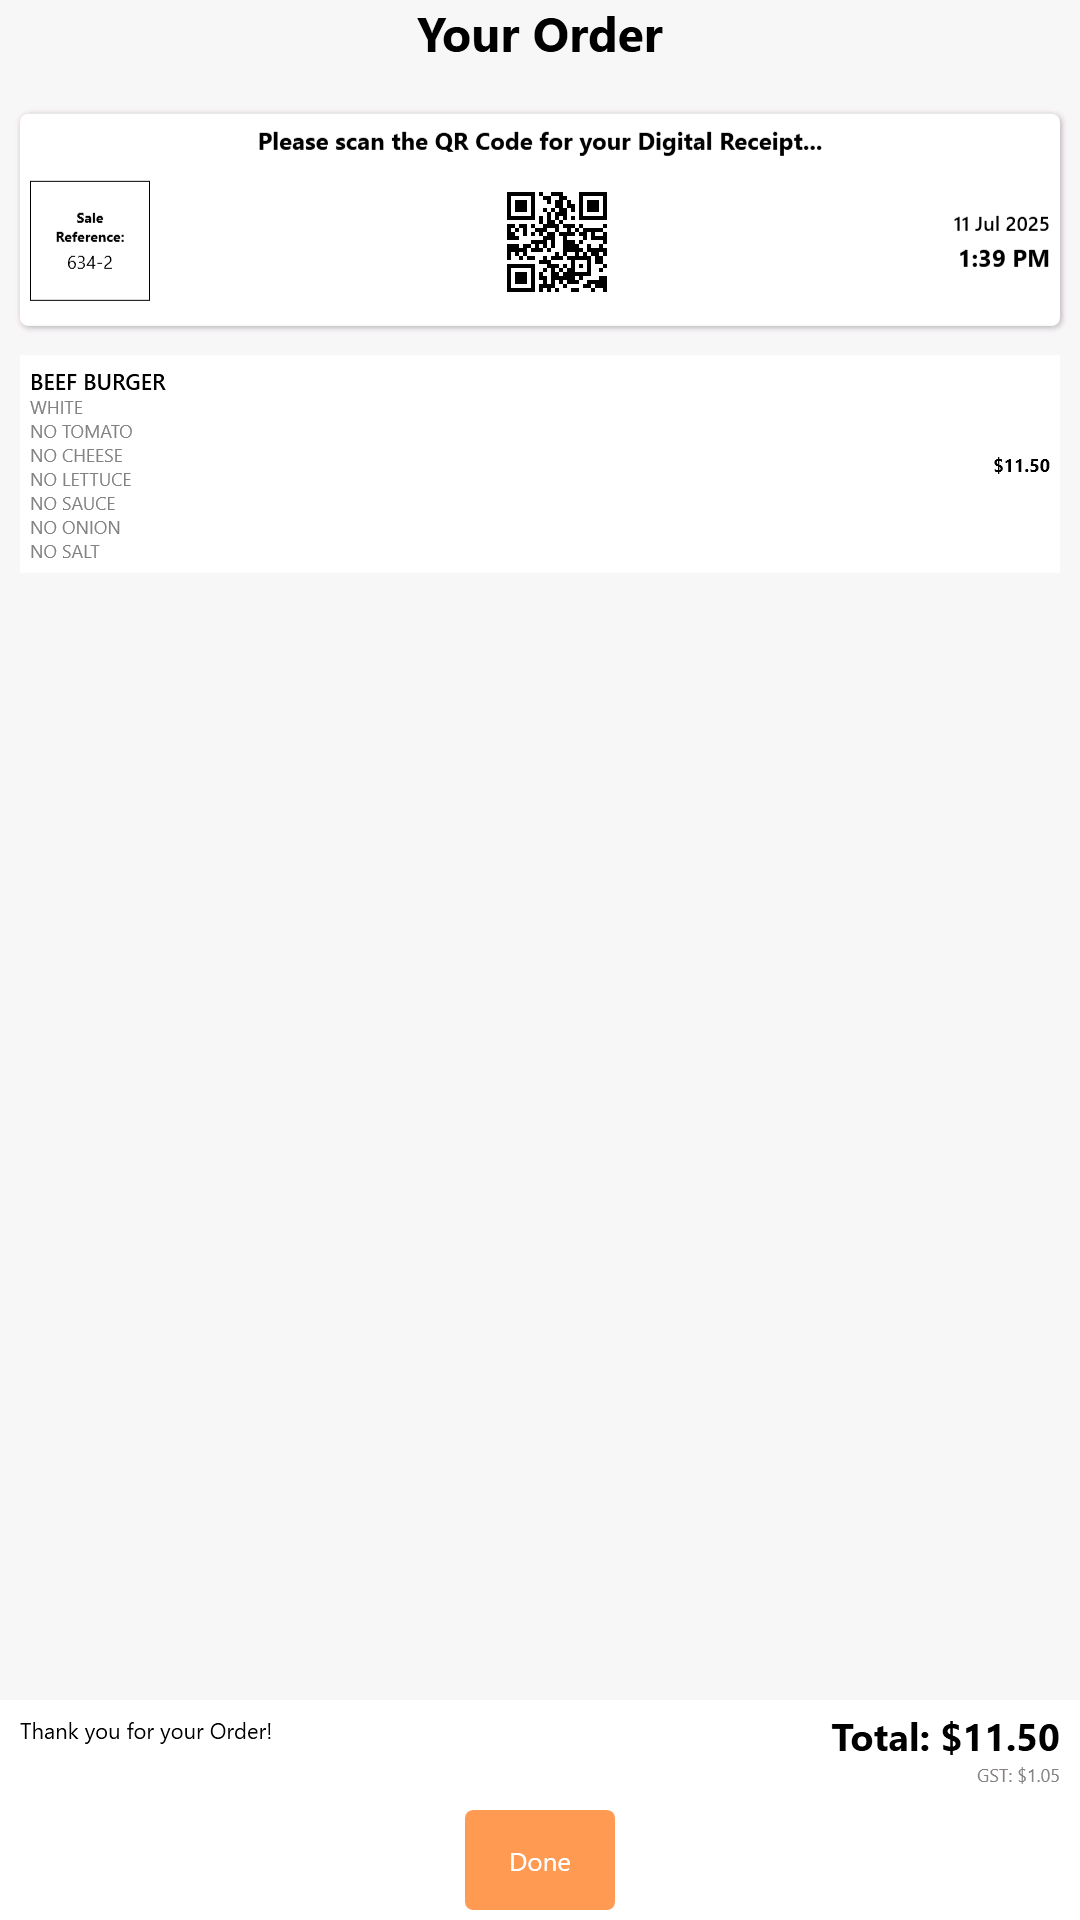
FIGURE 1-1: The Digital Receipt Screen configured with Header Text and no Header Image.
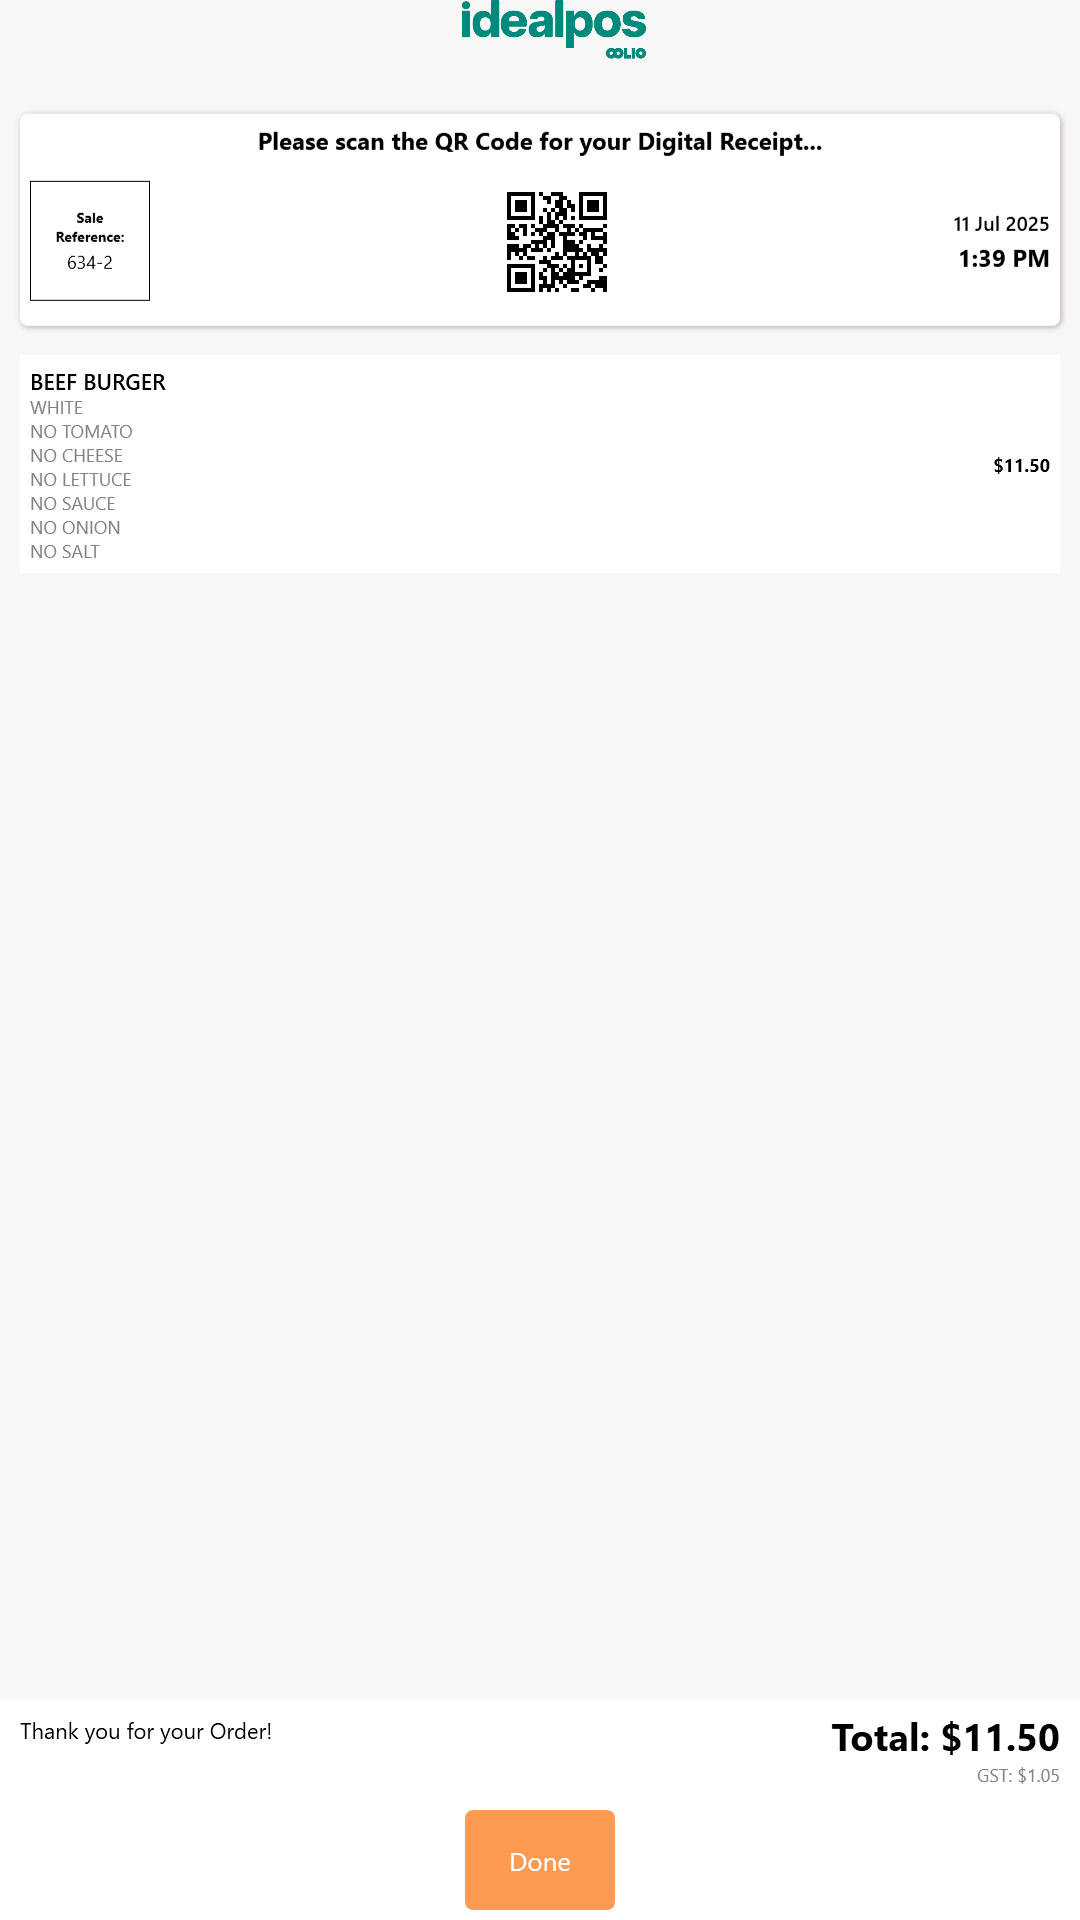
FIGURE 1-2: The Digital Receipt Screen configured with a Header Image and no Header Text.
The Idealpos Kiosk can be configured to display a Digital Receipt Screen at the end of the sale that will enable the customer to scan a QR Code to retrieve a digital receipt of the sale.
Note!
The Digital Receipt Screen functionality requires Idealpos Online!
After the customer has paid for their order on the Kiosk, the Digital Receipt Screen will appear with the following details:
The "Done" button can be pressed to close the screen.
If "Done" is not pressed, the Digital Receipt Screen will timeout and close automatically.
The Kiosk will then return to the Home Screen Image, ready for the next customer to place their order.
|
FIGURE 1-1: The Digital Receipt Screen configured with Header Text and no Header Image. |
FIGURE 1-2: The Digital Receipt Screen configured with a Header Image and no Header Text. |
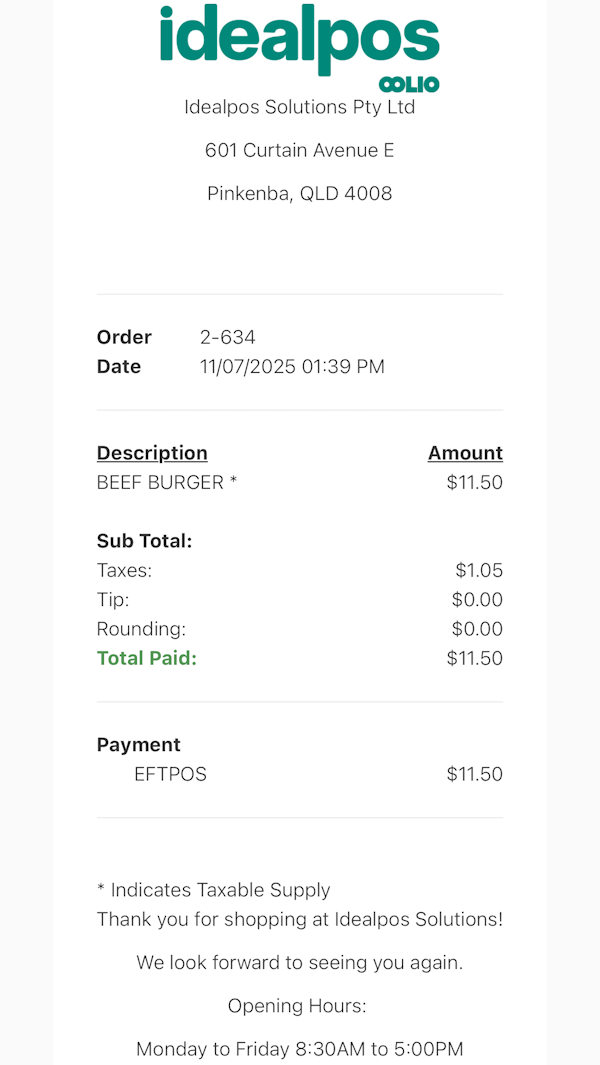
After the QR Code is scanned, the smartphone will open the Digital Receipt.
To configure this functionality, perform the following steps (Idealpos Online is required to use this functionality):
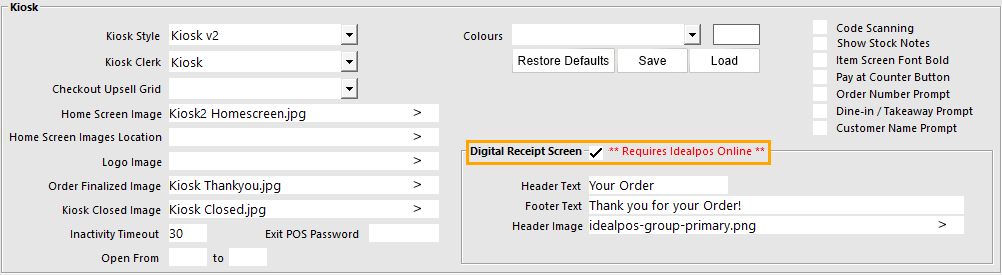
Go to: Back Office > Setup > POS Terminals > Select the Kiosk Terminal > Modify > Display/Kiosk tab.
When enabling the Digital Receipt Screen on the Kiosk, the standard Receipt Printer can remain configured on the Kiosk so that the Kiosk also produces a physical receipt printout.
If desired, the physical printer can be disabled so that receipts are only produced via the Digital Receipt Screen functionality.
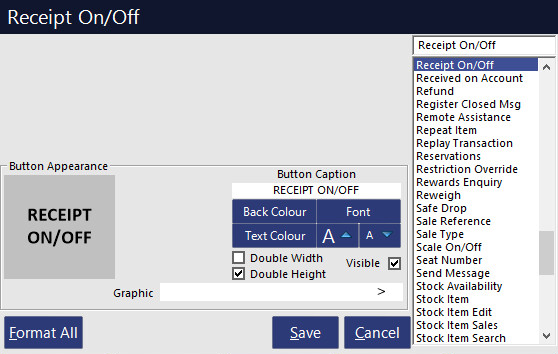
If the Printer needs to remain connected to the Kiosk but disabled, the Receipt On/Off function can be used to disable Receipt Printing on the Kiosk.
Note that the Receipt On/Off button will need to be temporarily created on the Kiosk > Receipt printing disabled > then remove the button afterwards (to prevent customers from toggling the option on/off).
Go to: Back Office > Setup > POS Screen > POS Screen Setup > Select the Kiosk terminal layout > Buttons.
Create a button and link to the Receipt On/Off function.
After the button has been configured, the Kiosk may need to be restarted via IPSUtils > Close Suite > Start Idealpos.
Press the Receipt On/Off button to toggle receipt printing.
After the function has been toggled off, the button can be removed.
Return to Back Office > Setup > POS Screen > POS Screen Setup > Select the Kiosk terminal layout > Buttons.
Select the button and link the function to None.
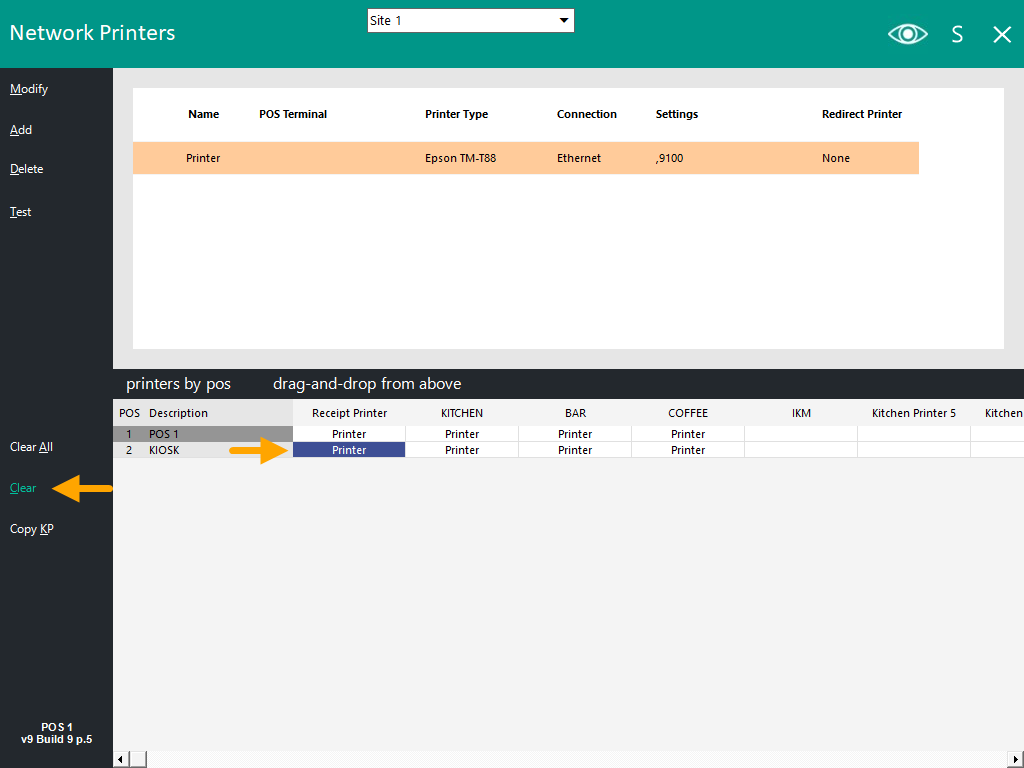
If the Printer is no longer required at the Kiosk, the Printer can be removed from Network Printers.
To remove the Kiosk's Printer from Network Printers, go to: Back Office > Setup > Network Printers.
Select the Kiosk Terminal's Receipt Printer slot and press the "Clear" button.
The Digital Receipt screen requires Receipt Format configuration in Idealpos Online.
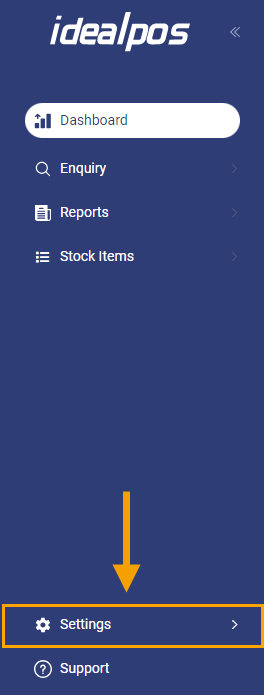
Go to: https://online.idealpos.com.au and login to the website using your username and password.
Once logged in, go to: Settings (bottom-left corner of the window > Settings).
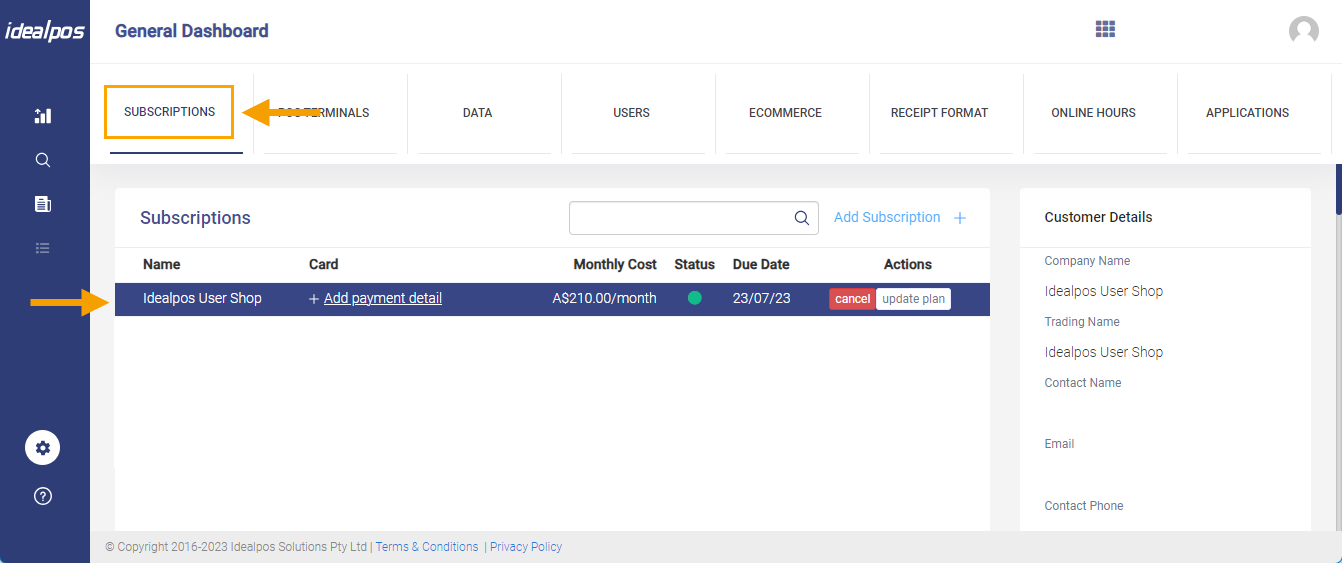
Within the "Subscriptions" tab, select the Subscription that contains the site with the POS Terminal(s) currently being configured.
Go to the "Receipt Format" tab, then click on the "Add Receipt Format +" button.

This is where the Receipt Format can be customised for your Digital Receipt.
Name: Enter a Name for this Receipt Format (e.g. Standard Digital Receipt Format). The name can be used to distinguish different Receipt Formats.
Company Name: Enter a Company Name for this Receipt Format.
Header Logo Graphic Upload: Upload a graphic that will be displayed in the Header portion of the Digital Receipt.
Header: Format the Header of your Digital Receipt here. This is where the details about the venue can be entered such as the venue name, venue address, venue ABN and any other details that are required in the header portion.
Footer: Format the Footer of your Digital Receipt here. This is where you may want to list additional details such as trading hours, thank you salutations, Terms and Conditions, refund policies and any other details that should appear at the bottom of the receipt in the footer area.
Footer Logo Graphic Upload: Upload a graphic that will be displayed in the Footer portion of the Digital Receipt. It is not compulsory to have a footer graphic, however, you may want to include one if required.
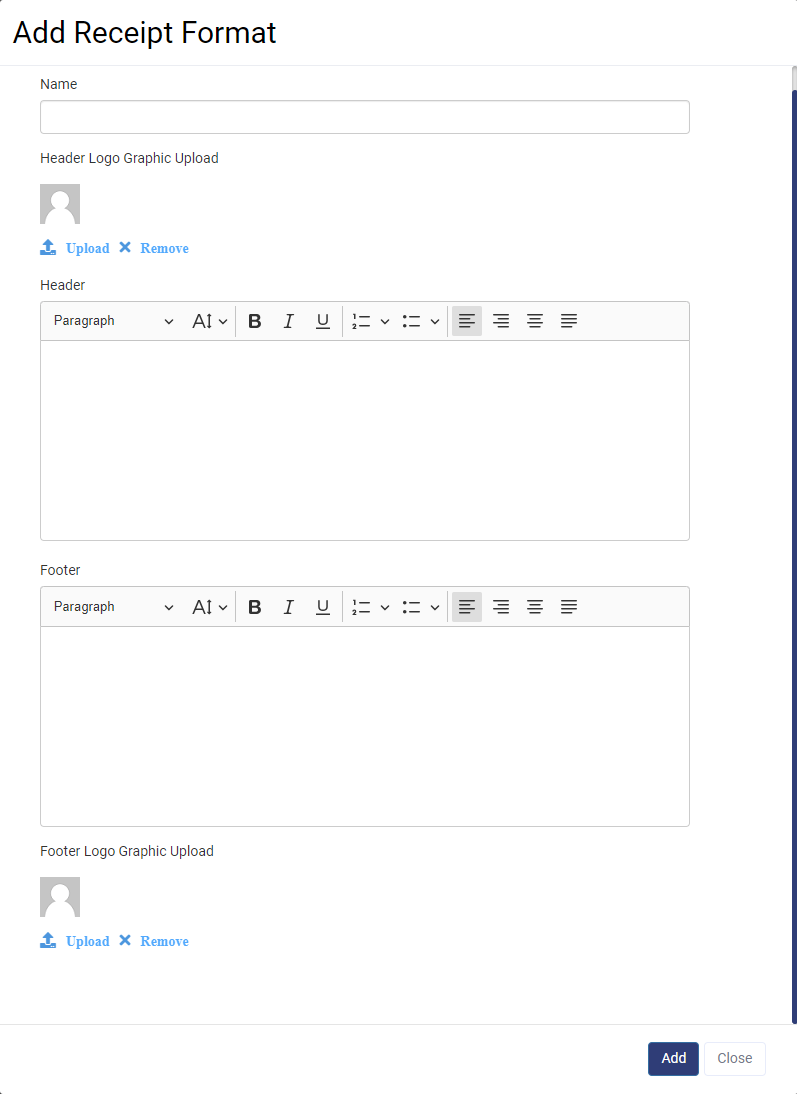
Once the desired Digital Receipt details have been entered, press the 'Add' button at the bottom-right corner of the window.
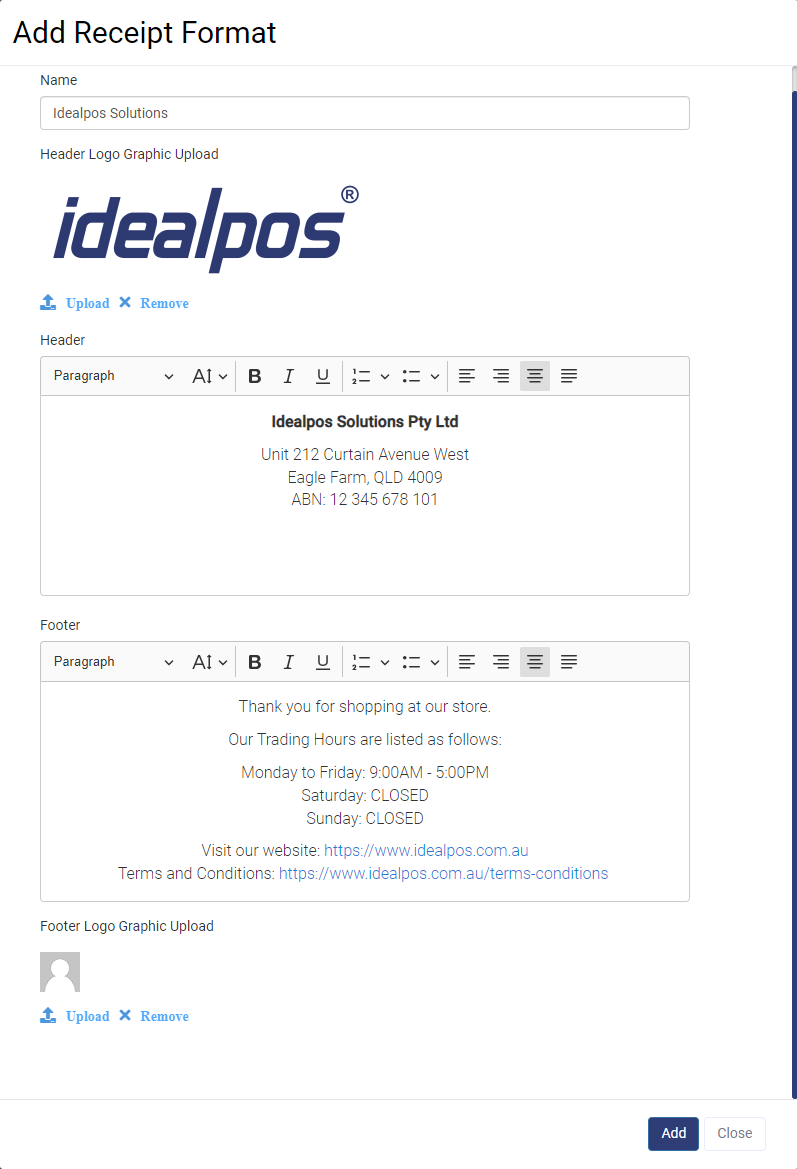
The below is an example of the 'Add Receipt Format' filled out with sample data.
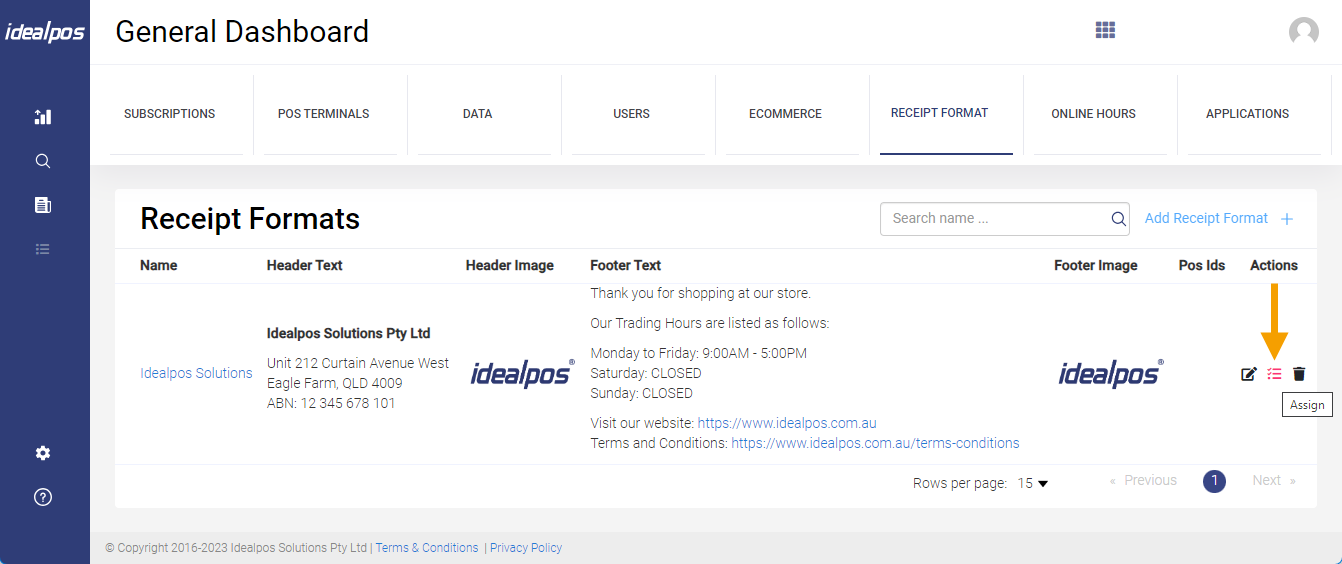
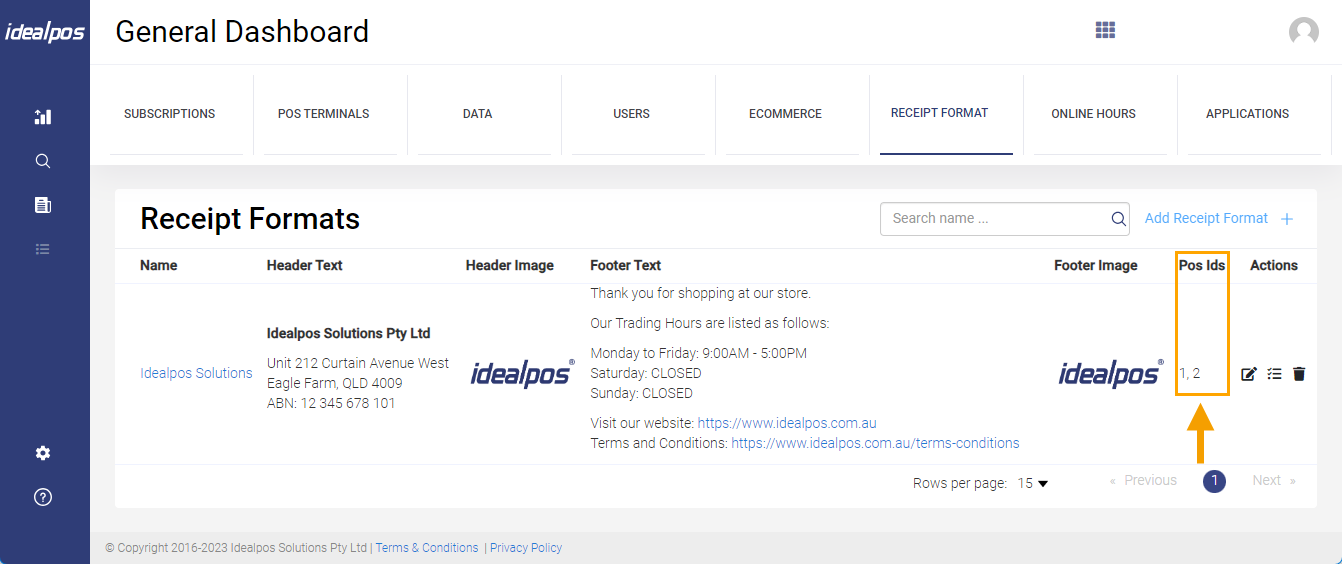
The newly created Digital Receipt Format will now appear under the list of Receipt Formats.
The Digital Receipt Format will need to be assigned to the POS Terminals that will use the format.
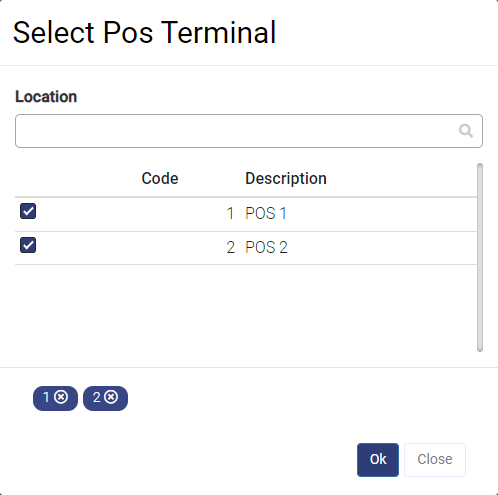
Press the assign icon next to the Receipt Format as illustrated below to assign POS Terminals.
A list of POS Terminals for the selected Subscription will be displayed.
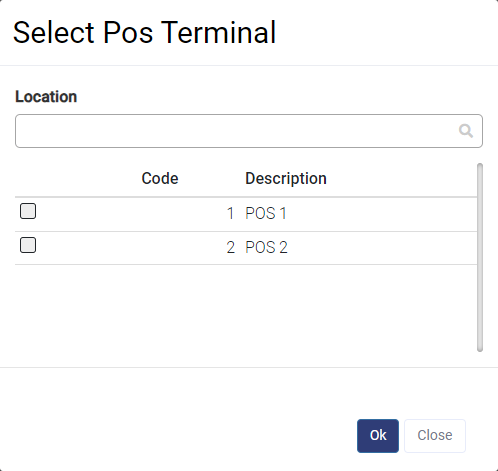
Enable the checkbox next to each POS Terminal that will use this receipt format > Press 'OK'.
The POS IDs will now be listed next to the Digital Receipt Format, indicating that those POS Terminals have been successfully linked to the selected Digital Receipt Format.
The Digital Receipt function has now been configured and is ready to be used with the Kiosk.
It is recommended that the Kiosk Terminals be restarted after performing the above configuration for the changes to take effect.